Step by Step Guide: How to Make a Battle Jacket
1. What is a Battle Jacket?
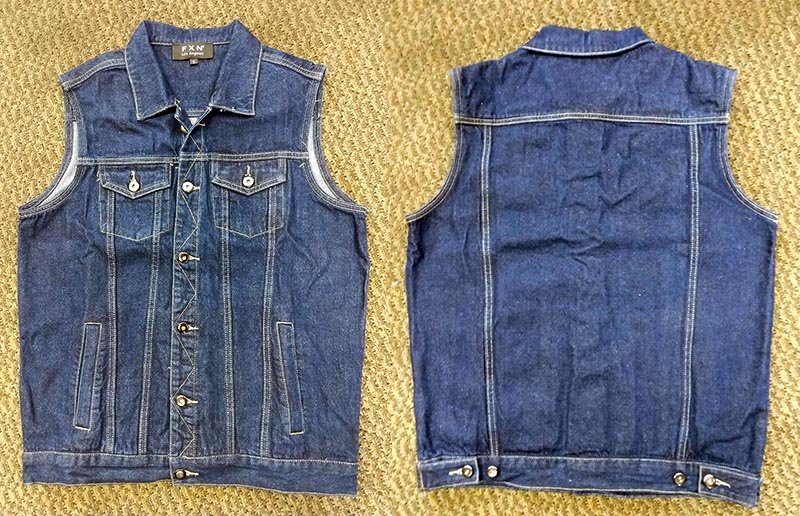
A battle jacket, also known as a battle vest, cut-off, or kutte, is traditionally a denim vest decorated with patches, and sometimes studs & other decor.
The battle jacket became mainstream in American biker culture in the 1970s, when bikers would cut the sleeves off of blue Levi’s denim jackets.
So why is it called a battle jacket? Well, its origins are actually older.
During World War II, Army Air Corps pilots wore
leather bomber jackets embellished with unit patches & hand-painted art. After the war, many pilots got into motorcycling & they started adding more patches & art to their old pilot jackets.
Today, of course, it is more closely associated with the punk & metal subcultures.
The word “kutte” is a German word that refers to a coat, or more specifically, a monk’s robe.
The battle jacket offers a standard canvas upon which to associate yourself as a member of a scene, while also affording you great license to express yourself authentically as an individual.
2. Where to Buy a Base Battle Jacket
If you can’t find a suitable jacket or vest in your closet, there are many options.
You can try Amazon or at a thrift store. Walmart often has affordable denim jackets in the Winter.
Levi’s is the classic choice, but there are many knock-off brands available, some that don’t have any branding on the buttons, and a little veering off from the norm can add a hint of individuality to your vest.
This brings me to an important point. The balance between how traditional & how individualistic you want to be is up to you. As long as it is a shirt or jacket that has symbols of your favorite institutions on it (bands, organizations, etc) then you’re obeying the spirit of the battle jacket.
If you want to go classic & traditional & be easily understood, go for it. If you want to break the mold & be innovative, go for it. Be yourself.
Can a battle jacket have sleeves? Yes.
If you do lop them off, though, you probably want to make it look ragged. To achieve this, just cut the sleeves off of your vest about a half inch from the seam (a wash cycle will help to fray the edges).
A popular option besides the denim vest is the leather battle jacket. This can be a biker-style black vest, or a classic motorcycle jacket. Leather is a more challenging option because it’s hard to sew and stud. There’s also usually lining to have consider.
3. Pre-wash, Dyeing & Painting
Pre-wash
Before you start enthusiastically destroying your fingertips with sewing needles & studs, it’s probably a good idea to wash your battle jacket now, before it becomes increasingly more difficult to wash. This is especially true if you purchased your jacket second-hand.
For new jackets, it might be a good idea to wash them as well and wash out any sizing & pre-shrink them before starting to sew onto them. Wash the jacket in hot water & then put it in a hot dryer cycle until dry to achieve the most shrinkage.
If you are using a black vest & you want to keep your vest looking as new as possible, you may want to skip the pre-wash. In that case, you can try a cold wash and air dry.
Dyeing
If you want a particular hard-to-find color or want to stand out a bit more than the average joe, this would also be a good time to look into dyeing your jacket.
Assuming you chose a denim jacket, you’re probably in good hands. 100% cotton is one of the easiest fibers to dye. (Just be aware that the stitiching is probably polyester & won’t take the dye.)
You can try a commonly available dye like Rit. You will need a large metal pot to boil water in & submerge your vest.
I personally prefer to use fiber-reactive dyes. They can be dyed in a plastic bucket of hot tap water. The colors will be deeper & won’t fade as fast.
You can get fabric-reactive dyes & supplies at
https://prochemicalanddye.net/ or you can just buy a small jar to start off with.
Paint
Spray some spray paint along the seams. Or use some acrylic artist’s paint.
For leather, use acrylic paints.
Angelus paints are very popular for leather. You want to avoid enamel spray paints on leather. Oil paints can work well on leather, but they will take forever to dry.
4. Deciding on Your Layout / Placement
Many people don’t know how to start their battle jacket. Before you do anything, it’s a good idea to develop a strong battle jacket concept.
Think about what’s important to you. Which areas do you want to cover in studs? Do you want to cover every square inch of your vest in patches? Which areas do you want to fill in first? What areas are you going to leave open for future patch acquisitions?
A good base to start your concept might be a large back patch. You want to build around your largest pieces.
Get some inspiration by looking at battle jackets on websites like
https://tshirtslayer.com/type/battle-jacket
You can also check out the coffee table book
Defenders of the Faith.
5. Buying Patches, Studs & Flair
It’s hard to even come up with a concept unless you have the pieces in-hand & can do a test layout.
You can buy patches & pins from vendors at shows,
eBay, the Battle Jacket Gallery & Trading Post on Facebook, and Metal Devastation.
You can buy studs on eBay and
Studs and Spikes.
Since authenticity is so important, make sure you are buying patches for bands you are familiar with & not just because the Kardashians are wearing their t-shirts.
For tips on how to make your own battle jacket patches, keep reading.

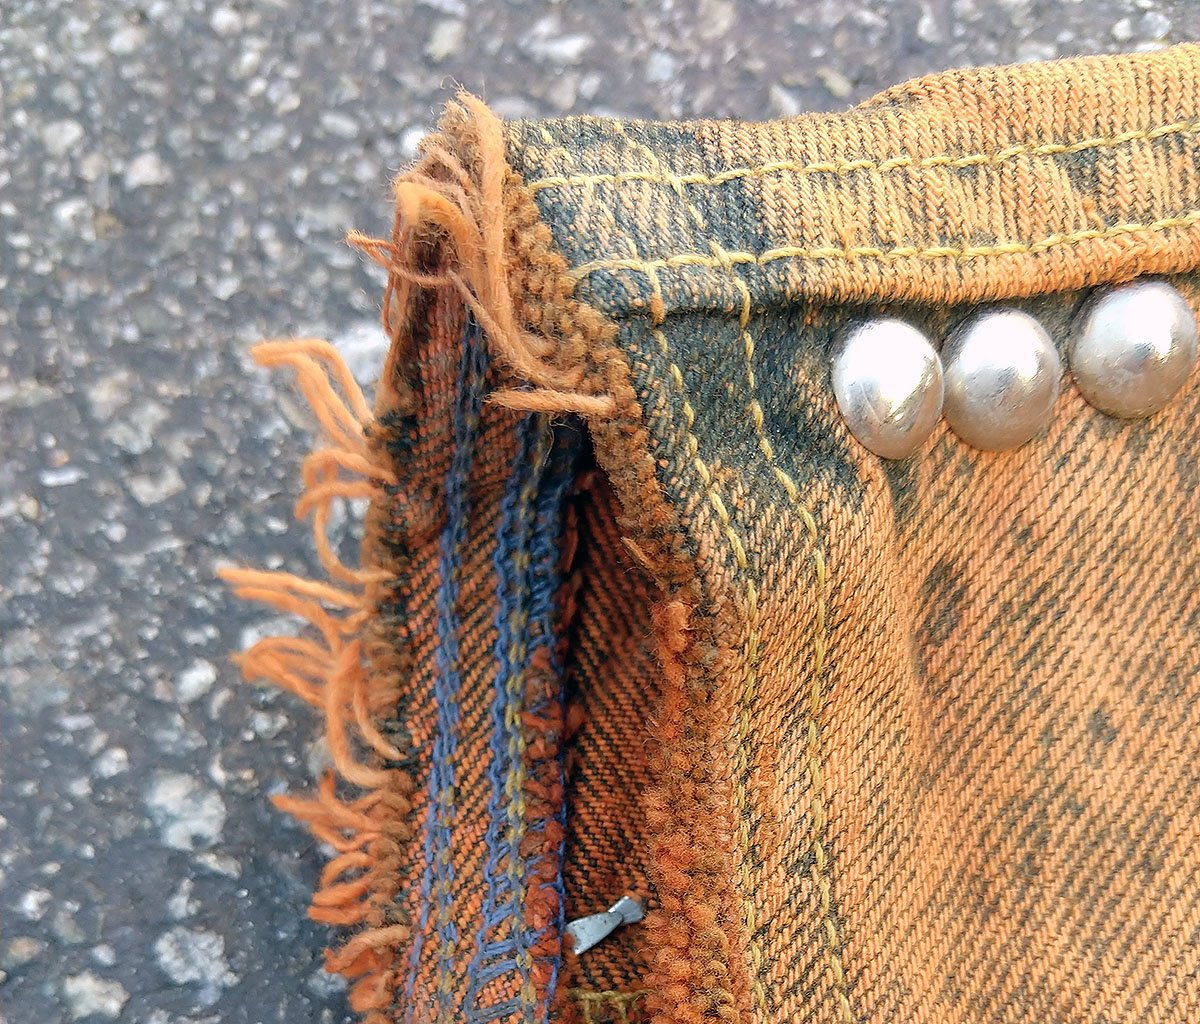
6. How to Stud a Battle Jacket
Studs normally work well to fill up panels on the jacket, or to run along the borders of the jacket’s panels.
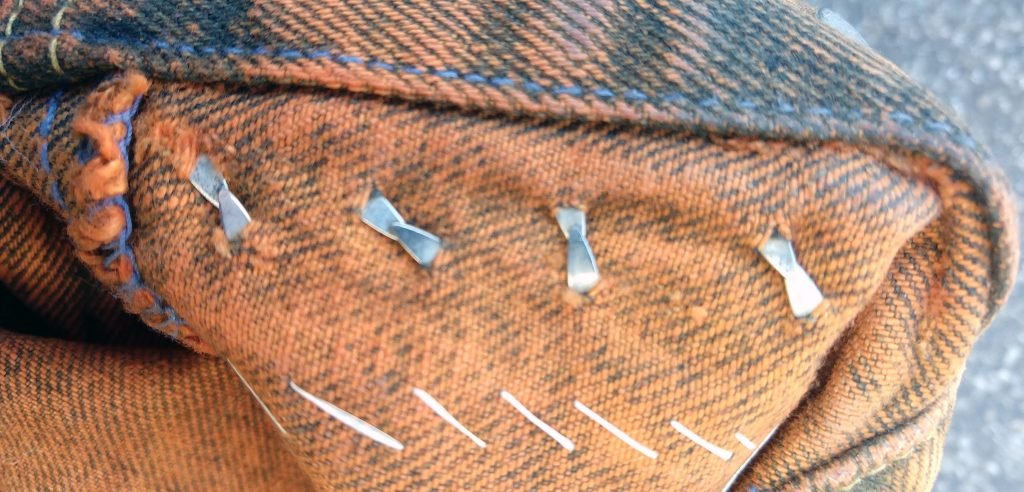
There are 2 types of studs. There are the classic tab style (called nailheads in the business) & the rivet type. If they have a screw-back, they’re really more spikes than studs, but maybe I’m splitting hairs.
If weight is an important consideration, the tab style will be the lightest, the screw-back the heaviest. It might be hard to keep the screw-backs upright, due to their weight & how solid the material is that they’re going into.
The tab style is going to be the hardest to put in, but they’re kind of a rite of passage. Rivet-backs could be useful on areas like seams or on leather battle jackets.
The first thing you’ll need to stud your jacket is a hole poker. There are all kinds of tools you can use. You can use a
small awl (from a leather supply store), a pick from a pick & hook set (hardware store) or a crochet needle (craft store).
Once the holes are poked, just push the tabs into the material & bend the tabs in. I usually use needle nose pliers to do the bending. Bend the tabs as far into the stud as you can, otherwise they might be too loose or the tabs will poke you during use. Squeeze a bit of
E6000 craft glue on the back of the studs to help them stay in place and keep any sharp edges from poking.
7. How to Sew Patches onto a Battle Jacket
First off, let’s talk about making your own patches. While they might not look as polished or professional as printed or embroidered patches, they can lend a certain level of authenticity to your jacket that is hard to match.
You can make your own patches with fabric & paint. Twill is a popular choice for patches because of its strong weave, but canvas can be great too.
Use paint, or if you want to go full crust punk, use correction fluid (White-out).
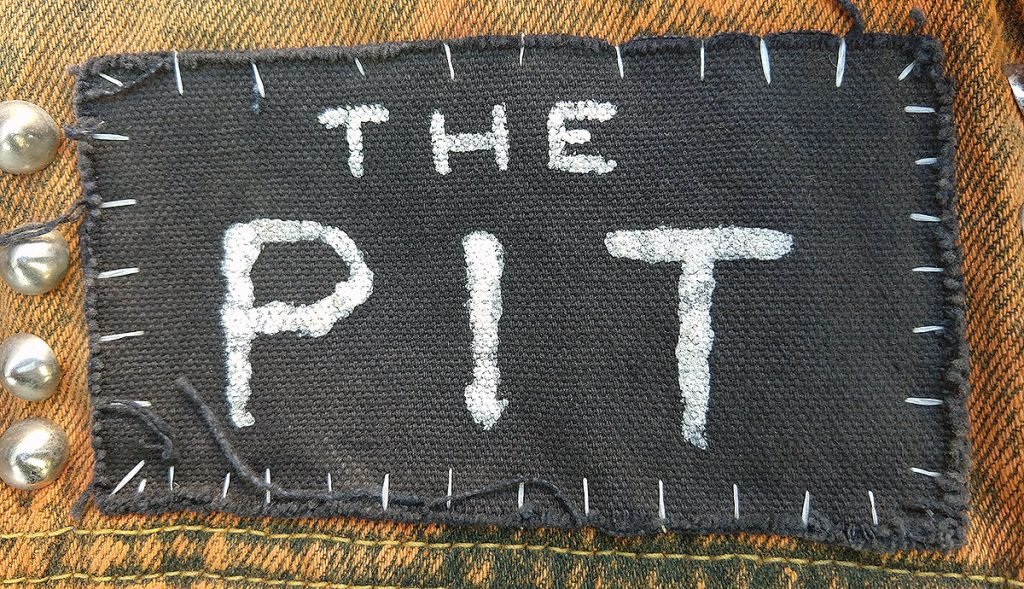
Make sure you measure & allow for any hemming you might want to do on the patch. Hemming will give you a cleaner edge, if that’s what you want. You can simply use some fabric glue to fold over and hem your patches.
Sewing
If you don’t know anything about hand stitching, here’s a very quick crash course.
Thread your needle so that you have 2 equal amount of thread on either side of the needle. Tie the 2 strands together at the bottom.
Start from inside the jacket. Hopefully your knot is large enough, or the patch is dense enough, to keep the knot from passing through. This will hold your thread taught as you pass in & out of the jacket. If possible, end up where you started & tie the ends together. Or at least learn to make some knots with your thread before you cut it & load a new thread.
A big thing to be aware of on denim jackets: it will be a challenge to stay away from the 2 lower pockets! You will have to maneuver carefully, or just use iron-ons on the entire belly of the jacket. You don’t want to end up sewing your pockets shut.
Thread & Needle
Most people recommend using
Gutermann thread and needles size 6 or larger. You can also use floss instead of thread. You can buy large spools of floss on eBay, or go to a dollar store for small amounts.
Stitching Patterns
The most popular stitch pattern is the whip stitch. This is a very simple stitch where you move the needle through the fabric in a corkscrew fashion, leaving parallel stitches on either side of the fabric.

Iron-on
A quick note about iron-on patches. Make sure you don’t apply the iron directly to the patch. Use a pillowcase or thin piece of cotton fabric in between. After application, add some heat from the inside too.
8. Tips for Adding Pins, Buttons, Etc
Here are some tips on making pins & buttons safe from falling out or sticking you.
If you have a safety pin type of closure, you can use
E6000 glue to keep the pin from slipping out.
For the pointy pins with the clasp backing, you can
buy locking pin keepers that you use a little allen wrench to tighten.
9. Distressing, Bleaching
Depending on your style, you might want to make your battle jacket look like it’s actually been to war. A last step could be to use paint, spray paint, bleach or even iron-based rust paint to add some zazz to your battle jacket.
10. How to Wash a Battle Jacket
Can you wash a battle jacket? Yes, you can. Make sure any paint you’ve used has had a few days to cure. These steps are probably best done in your bathtub/shower.
For leather, you want to be very careful, as washing (& particularly drying) can easily shrink the leather, but it can be done. You might be better off dry-cleaning it professionally.
Here are some tips on how to clean a battle jacket:
- Find a 5-gallon plastic bucket
- Pour a tiny bit of liquid laundry detergent in
- Fill the bucket half-way with warm water
- Put your battle jacket in & gently agitate it by hand
- Let it soak for a couple hours
- Take the jacket out. Pour out the bucket, rinse out any detergent residue
- Fill the bucket with warm water. Put the jacket in and agitate.
- Repeat this rinse again until the water is clear & you feel you have gotten any soapy residue off.
- Hang on a wooden or plastic hanger until dry, ideally outside in the shade on a hot Summer day. Bring it in as soon as it’s dry.
Frequently Asked Question
How should a battle jacket fit?
This depends on how you’re planning on using it. If you might want to wear it over a leather jacket, you can probably get away with a regular sized jacket (since you won’t need to button it anyway). If you’re just going to wear it over a t-shirt & don’t plan on ever buttoning it, a size smaller than usual can look really great. If in doubt, just go for your regular size.